Client SDK
The Client SDK is used to securely collect payment details in the browser.
The Client SDK will seamlessly plug into your existing payment page. When it's initialised, it will securely load an iframe hosted by payFURL. The iframe will collect the payment details, which will then be submitted to payFURL and converted to a payment token. The payment token will be added as a hidden input to the form. In case of PayPal or Buy Now Pay Later payments the payment details will be converted to a transactionId. The transactionId will be added as a hidden input to the form. Collecting the payment details is triggered when the form is submitted.
You can either install the Client SDK using:
- npm
- embedded script
Install using npm
To install using npm:
npm install @payfurl/client
And to import into your application
import payfurl from '@payfurl/client';
Install using embedded script
To install using embedded script (add the script first on your checkout page):
<script src="https://assets.payfurl.com/v4.7.1/js/payfurl.js" integrity="sha384-uFOgIAnDdD0t9CvFuui/JaPn/VpzcHWbI+MJ+n0NrBpCikzlGy95VnPYi4/oW8Ri" crossorigin="anonymous"></script>
The integrity attribute contains a cryptographic hash of the resource.
For a list of past JavaScript SDK versions and their SRI hashes, please refer to the Past JavaScript SDK Versions page.
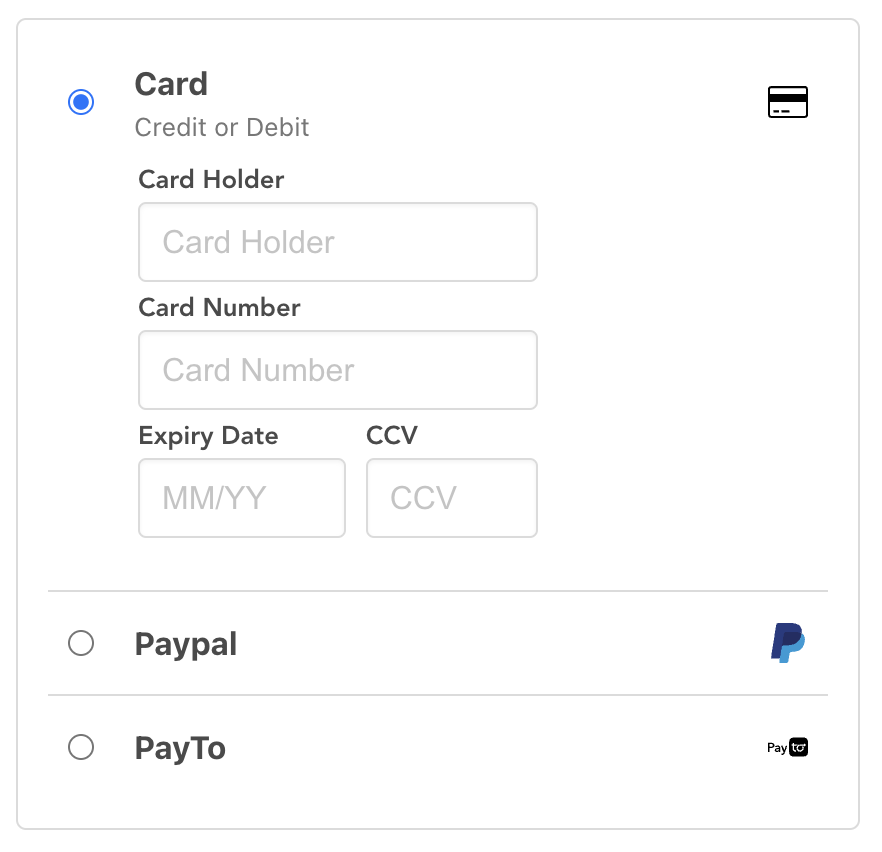
Get started using Dropin UI
The simplest start to this is to use the dropin ui to create an integrated payment UI for most payment options. This will automatically append the payment options into your page in the html element you select.
The dropin ui looks like this:
Start by copy the Public key for your account (under "Account" in the dashboard), you'll need this to set up the Client SDK
Using the Dropin UI will automatically find the best provider for amount and currency.
To create a drop in UI:
<!DOCTYPE html>
<html>
<head>
  <meta charset="utf-8" />
  <meta name="viewport" content="width=device-width, initial-scale=1" />
  <title>payFURL Card iframe example</title>

  <script type="text/javascript" src="https://assets.payfurl.com/v4.7.1/js/payfurl.js" integrity="sha384-uFOgIAnDdD0t9CvFuui/JaPn/VpzcHWbI+MJ+n0NrBpCikzlGy95VnPYi4/oW8Ri" crossorigin="anonymous"></script>
  <script type="text/javascript">
    window.addEventListener('load', function() {
      payfurl.init('sandbox', '<public key>').addDropIn('iframeContainer', 20, 'AUD');
      // .addDropIn('<put the id of the html element here>', <put the payment amount here>, '<put the currency here>', 'options (optional)');
    });
  </script>
</head>

<body>
<h1>This is a payment page</h1>

<form method="POST" action="/">
  <div id="iframeContainer"></div>

  <div>
    <button type="submit">Submit</button>
  </div>
</form>
</body>
</html>
If there is no PayPal provider in the account, then the PayPal option won't be shown.
Options parameter is optional and can be used to modify the behaviour of the drop in UI.
Updating the payment amount
If the amount for the transaction on the checkout page can change, you will want to update the amount so that the lowest cost provider is used for the transaction. This could be triggered by an onchange event in the cost input.
// replace 'total' with your amount input
document.getElementById('total').onchange = function () {
  payfurl.setAmount(document.getElementById('total').value);
};
Extending and modifying the drop in UI
You can extend and modify this in a number of ways by passing in an options parameter. None of the options are required and you can mix and match based on your needs.
Using a specific provider
By default, the best provider will be selected for each payment option. If you want to use a specific provider, you can specify this in the options parameter.
window.addEventListener('load', function () {
  payfurl
    .init('sandbox', '<public key>')
    .addDropIn('iframeContainer', 20, 'AUD', { cardProviderId: '<Card Provider Id>', paypalProviderId: '<PayPal Provider Id>' });
});
You can specify just one provider, for example if you wanted to use as specific PayPal provider but wanted to automatically select the card provider.
window.addEventListener('load', function () {
  payfurl.init('sandbox', '<public key>')
    .addDropIn('iframeContainer', 20, 'AUD', { paypalProviderId: '<PayPal Provider Id>' });
});
Enabling Paypal Pay in 4
You can enable Paypal Pay in 4 by passing an extra parameter (paypalEnablePayIn4):
window.addEventListener('load', function () {
  payfurl.init('sandbox', '<public key>')
    .addDropIn('iframeContainer', 20, 'AUD', { paypalEnablePayIn4: true });
});
Modifying the PayPal Button
You can modify the PayPal buttons to change the colour of the button by passing an optional parameter (paypalButtonStyle):
window.addEventListener('load', function () {
  payfurl.init('sandbox', '<public key>')
    .addDropIn('iframeContainer', 20, 'AUD', { paypalButtonStyle: 'blue' });
});
You can set this as either:
- gold
- blue
- silver
- white
- black
The default button colour is gold.
Other options can be found on the Configuring the Drop In UI page.
Using individual payment components
You can also use individual payment components (e.g., just card or just PayPal). You can use each component independently or together to build out your own custom UI.
- Creating a Card component
- Creating a Card Least Cost component
- Creating a PayPal component
- Creating a GooglePay component
- Creating a PayTo component
- Creating a UPI component
Other extension options
You can also extend this in other ways
Success handler
By default, the form will be submitted when the payment details are token used. You can override this by adding a custom function handler for when payment information is successfully converted to a payment token. The success message will include the token (for card payments) or to a transactionId (for PayPal or Buy Now Pay Later transactions). The success message will include the token (or transactionId).
You can add your handler by calling onSuccess():
function myHandler(message) {
  console.log(message);
  // message will contain {token: '<token here>'} or {transactionId: '<transactionId here>'}
}

payfurl.onSuccess(myHandler);
Failure handler
You can add a custom function handler for when payment information fails to be successfully tokenised. The failure message will contain the error message.
You can add your handler by calling onFailure():
function myHandler(message) {
  console.log(message);
  // message will contain { error: '<error message>' }
}

payfurl.onFailure(myHandler);
Loaded handler
You can add a custom function handler for when payment form is ready.
You can add your handler by calling onLoaded():
function myHandler(message) {
  console.log(message);
  // message will contain { error: '<error message>' }
}

payfurl.onLoaded(myHandler);
Validate handler
You can add a custom function handler to validate required fields outside of the plugin (e.g., a checkbox for "Terms and Conditions").
The payment process will only continue if the handler returns true.
Here is an example of how to implement this:
function validateFields() {
  // Check if the "Terms and Conditions" checkbox is checked
  const termsCheckbox = document.getElementById('terms');
  if (!termsCheckbox || !termsCheckbox.checked) {
    alert('Please agree to the Terms and Conditions.');
    return false;
  }
  // Add other validation checks as needed
  return true;
}

payfurl.onValidate(validateFields);
Custom success message for collecting payment details
You can add a custom success message for when payment details are successfully collected. By default, the message is "Payment details collected".
payfurl.successMessage("Some custom message");
Adding logging
If you're running into issues, one option is to switch on more logging to better understand the issue.
You can do this by passing an extra parameter:
window.addEventListener('load', function () {
  payfurl.init('sandbox', '<public key>', true)
    .addDropIn('iframeContainer', 20, 'AUD');
});
Tokenise card details
You can tokenise card details without using the DropIn UI by calling tokeniseCard().
payfurl.tokeniseCard('<Card Provider Id>', '<card number>', '<expire date>', '<cardholder>', '<ccv>', '<metadata (optional)>', 'options (optional)');
where metadata is an optional parameter that can be used to pass additional information required for some gateways (i.e. Document ID for providers in Latin America).
options is an object that can contain the following properties:
createNetworkToken: force to create a network token (can betrueorfalse, default isfalse)verify: verify the card details (can betrueorfalse, default isfalse)
You will receive the token in the success handler.
function myHandler(payload) {
  console.log(payload.token);
}

payfurl.onSuccess(myHandler);
Tokenise card details with 3D Secure verification
You can tokenise card details while performing 3D Secure verification.
payfurl.tokeniseWith3Ds('iframeContainer', '<Card Provider Id>', '<card number>', '<expire date>', '<cardholder>', '<ccv>', '<email>', '<put the payment amount here>', '<put the currency here>', '<metadata (optional)>', '<options (optional)>');
where metadata is an optional parameter that can be used to pass additional information required for some gateways (i.e. Document ID for providers in Latin America),
options is an object that can contain the following properties:
requireChallenge: force 3D Secure challenge (can betrueorfalse, default isfalse)createNetworkToken: force to create a network token (can betrueorfalse, default isfalse)verify: verify the card details (can betrueorfalse, default isfalse)
3D Secure verification on an existing token
You can perform 3D Secure verification on an existing token.
payfurl.addThreeDsWithToken('<token>', '<email>', '<amount>', '<3-letter currency code>', '<ccv (optional)>', '<options (optional)>');
options is an object that can contain the following properties:
requireChallenge: force 3D Secure challenge (can betrueorfalse, default isfalse)